1. Clearing the Area
Remove debris, vegetation, and existing materials for a clean workspace. This prevents interference with resin bonding.
Foundation
As you prepare for your resin driveway installation, remember that thorough preparation not only enhances durability but also elevates aesthetic appeal. Are you ready to lay a solid foundation for your outdoor transformation?
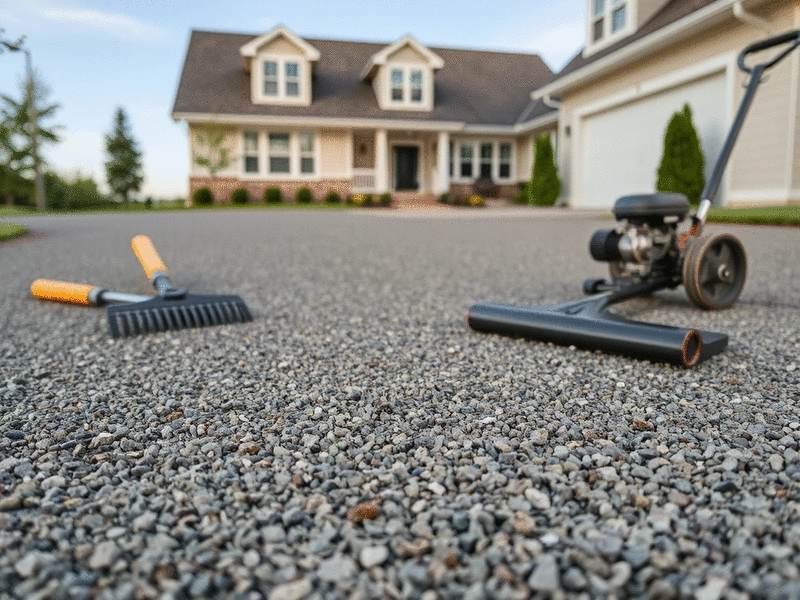
Ensuring a durable and aesthetically pleasing resin driveway relies heavily on meticulous surface preparation. The visual below outlines the critical steps involved in getting your existing surface ready for installation.
Remove debris, vegetation, and existing materials for a clean workspace. This prevents interference with resin bonding.
Ensure the sub-base is even and well-compacted using MOT Type 1 to prevent cracking or sinking.
Test moisture levels and avoid installation during adverse weather to ensure proper resin curing.
Install timber or concrete restraints to prevent resin spillage and ensure a clean, defined edge.
Apply primer for enhanced adhesion and mask edges to achieve a professional, clean finish.
Thoroughly clean with agents like degreasers or pressure washing to remove contaminants for optimal adhesion.
Preparing your existing surface is a crucial step for a successful resin driveway installation. Without proper preparation, issues like uneven surfaces, moisture retention, and compromised adhesion can arise. These problems can lead to costly repairs and a driveway that doesn't look or function as intended. Trust me, taking the time to prepare your surface correctly can save you headaches down the line!
When homeowners skip this essential step, they might face unexpected complications. For instance, if debris or vegetation is left on the surface, it can interfere with the resin's bond, resulting in peeling or cracking over time. It's clear that a little effort up front can make a significant difference in the longevity and aesthetic appeal of your resin driveway. For a comprehensive overview of the entire process, check out our resin driveway installation guide in Nottingham.
Proper surface preparation is not just a formality; it lays the foundation for the entire project. By ensuring a solid base, you enhance the durability and appearance of your new driveway. Some of the main reasons to prioritize this step include:
By understanding these factors, you can appreciate why preparation is essential. Not only does it affect the driveway's functionality, but it also impacts its overall appearance!
Before diving into your resin driveway installation, it's important to consider a few key factors that can impact the process. These include local regulations, environmental conditions, and the quality of materials you'll be using. Here’s a quick overview:
By addressing these factors beforehand, you'll avoid potential setbacks and ensure a smoother installation experience!
The first step in preparing your surface for a resin driveway is clearing the area. Begin by removing any debris, such as leaves and branches. Next, you'll want to eliminate any vegetation, including grass and weeds, that might disrupt the installation.
By starting with a clean slate, you set the stage for a successful installation. A clear area will not only make the job easier but also improve the final look of your driveway!
Once the area is clear, it’s time to level and compact the sub-base. This step is vital for ensuring a solid foundation for your resin driveway. You’ll want to use materials like MOT Type 1 for this process.
By creating a solid foundation, you can help prevent future issues like cracking or sinking. Trust me, this step is worth the time and effort! Understanding the various cost factors for resin driveways, including base preparation, can help you budget effectively for your project.
Moisture control is essential for the curing process of your resin driveway. You want to ensure that the conditions are just right for the resin to set properly. Start by testing moisture levels in the existing surface.
By controlling moisture, you help guarantee a successful installation that will stand the test of time!
Installing edge restraints is a key step to prevent resin spillage during the installation. These restraints help keep everything contained and ensure a clean finish. Here's how to do it:
This step is crucial for maintaining the shape of your driveway and avoiding messy spills that can ruin the aesthetic!
Before applying the resin, it’s important to prime the surface and protect the edges. Priming helps enhance adhesion, while protecting the edges provides a clean border. Here are some steps to follow:
These final preparations are key to achieving a professional finish. You’ll be glad you took the time to do it right!
Finally, it’s time to clean the surface before installation. A thorough clean ensures that any dirt or grease is removed, allowing the resin to adhere properly. Here’s how to do it:
A clean surface is the last step in your preparation process, setting you up for a successful resin driveway installation!
When clearing the area for your resin driveway installation, consider using a leaf blower for efficiency. Not only does it save time, but it also ensures that even the smallest debris is removed, paving the way for a flawless installation. A clean surface is your best ally for achieving a durable and visually appealing driveway!
Preparing your existing surface for a resin driveway installation is crucial for ensuring a lasting and beautiful outcome. Each step plays a vital role in achieving that perfect finish. Here’s a quick recap of the essential steps to remember:
By following these steps carefully, you set the stage for a resin driveway that enhances your home's curb appeal and functionality. Every detail matters, so taking the time to prepare thoroughly will pay off in the long run!
As you get ready for the installation, it’s essential to assess whether you feel confident in tackling the preparation yourself. If you have experience in home improvement, you may find it rewarding to dive into this project! However, if you’re unsure or the tasks seem overwhelming, it might be wise to consider hiring professionals. They can ensure that all steps are executed with precision, helping to avoid potential issues down the line.
At Resin Driveways Nottingham, we often recommend reaching out to local experts who can assess your specific situation and provide tailored advice. This way, you can rest assured that your driveway will be installed correctly, enhancing your home’s value and appearance.
I’d love to hear from you! Have you tackled a resin driveway preparation before? What challenges did you face, and how did you overcome them? Feel free to leave your experiences or questions in the comments below. Your stories can inspire and help others in our Nottingham community looking to enhance their homes. For more inspiration on how different patterns can elevate your space, explore designing a seamless resin driveway.
Once your resin driveway is beautifully installed, maintaining it is key to ensuring its longevity. Here are some practical tips to keep your driveway looking its best:
By following these maintenance tips, you can extend the life of your resin driveway, ensuring it remains a stunning feature of your home for years to come!
Here is a quick recap of the important points discussed in the article:
William Ashford is a Nottingham-based home improvement enthusiast and expert, passionate about enhancing property aesthetics and value through resin driveways. He shares practical advice to empower homeowners in making informed decisions about their outdoor spaces, blending lifestyle and functionality.


