Site Preparation & Survey
Clearing debris, leveling ground, identifying drainage needs, checking utilities and soil quality.
Critical Phase
Did you know that understanding the resin driveway installation process can significantly enhance your property’s curb appeal? This article breaks down essential insights to help homeowners navigate through this transformative project with confidence.
This visual outlines the crucial stages and influencing factors in a typical resin driveway installation process, from initial preparation to final curing.
Clearing debris, leveling ground, identifying drainage needs, checking utilities and soil quality.
Creating a solid foundation with gravel and resin mix for support and drainage.
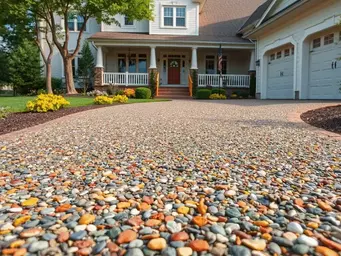
Choosing epoxy/polyurethane resins and aggregate sizes for desired look and function.
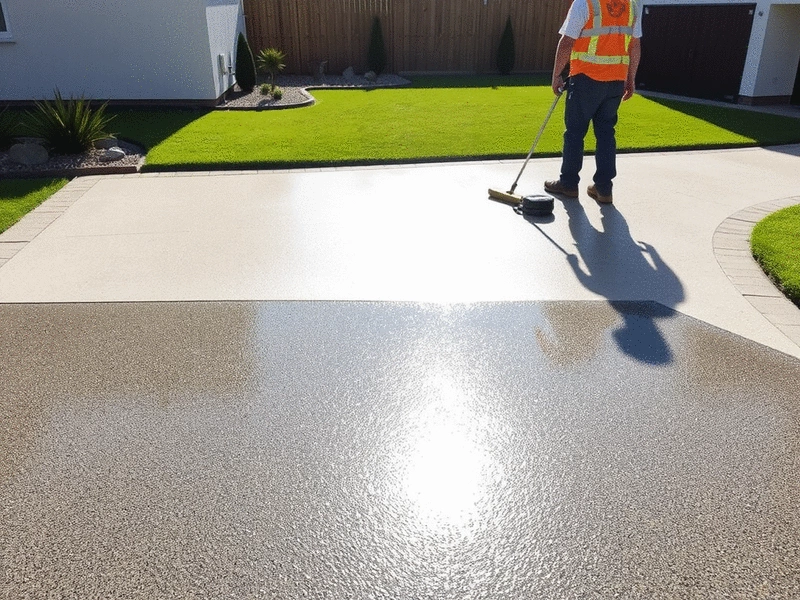
Professionally mixing and spreading resin and aggregate for a flawless finish.
Allowing 24-48 hours for foot traffic, up to a week for vehicle use, depending on conditions.
Understanding the resin driveway installation process is crucial for homeowners like you who want to enhance their property. Knowing what to expect can significantly reduce stress and ensure a smoother experience. From planning to execution, every step matters, and being informed will empower you to make the best decisions for your home. For a more detailed look into planning your project, read our guide on budgeting for resin driveways in Nottingham.
As someone who has dedicated time to mastering this craft, I can tell you that the more you understand the installation timeline and stages, the better equipped you will be to oversee the project or discuss it with contractors. Let’s dive into the key elements that will help demystify this process!
The timeline for installing a resin driveway can vary greatly depending on several factors. Generally, you can expect the process to take anywhere from a few days to a couple of weeks. This includes preparation, installation, and curing time.
By mapping out these stages, you’ll have a clearer picture of how the project will unfold. This not only prepares you for the waiting period but also allows you to plan around any potential disruptions.
Site preparation is perhaps one of the most critical phases of your resin driveway installation. It involves clearing the area of any debris, plants, or old surfaces, and leveling the ground to create a stable foundation. This stage ensures that the final product is not only aesthetically pleasing but also durable.
Imagine a smooth canvas ready for your beautiful resin driveway! Without proper preparation, you may encounter issues later on, such as uneven surfaces or drainage problems. To avoid common issues, learn how to prep your surface for a resin driveway effectively.
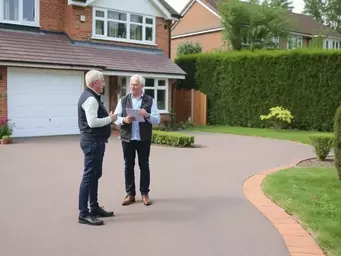
A thorough site survey plays a pivotal role in the success of your installation. This survey involves assessing the area for any potential obstacles, such as tree roots, pipes, or uneven ground. Recognizing these factors early on can save you time and reduce the likelihood of unexpected costs.
By investing in a comprehensive site survey, you position yourself for a successful installation and a long-lasting driveway.
Once the site is prepped, it’s time to install the base layer. This layer often consists of a mix of gravel and resin that creates a solid foundation for your driveway. It’s essential to use high-quality materials and proper techniques to ensure longevity.
A well-installed base layer not only supports the top resin layer but also aids in drainage, preventing water from pooling and causing damage over time. Remember, a strong foundation is key to a successful resin driveway!
Now, let’s talk about the heart of your resin driveway—the resin binder and aggregate mix. Selecting the right type is vital for achieving the desired look and functionality. There are various options available, each offering unique benefits.
Taking the time to choose the right mix will ensure that your driveway stands out and meets your practical needs!
The application phase is where the magic happens! This involves mixing the resin and aggregate, spreading it evenly across the prepared base, and smoothing it out to achieve a flawless finish. It’s an art form that requires skill and attention to detail.
To get the best results, I recommend hiring professionals who are experienced in resin application. This way, you can be confident that your driveway will not only look great but also last for years to come! Knowing the resin driveway installation pitfalls can help you choose the right professional.
Finally, let’s address the curing time. This is the period it takes for the resin to set and harden fully. Factors influencing this time include temperature and humidity levels. Generally, you should allow at least 24 to 48 hours before foot traffic and up to a week for vehicle traffic.
Understanding these timelines will help you plan your driveway's use and ensure that it remains in top condition right from the start!
To ensure the longevity of your resin driveway, consider applying a sealant after the curing process. This not only enhances the color and finish but also provides an extra layer of protection against stains and weathering. Regular maintenance, such as cleaning and re-sealing every few years, can keep your driveway looking brand new!
A: The entire process, from preparation to final curing, generally takes anywhere from a few days to a couple of weeks, depending on the size and complexity of the project, as well as weather conditions.
A: Proper site preparation, including clearing debris and leveling the ground, is crucial for creating a stable and durable foundation. Without it, you risk issues like uneven surfaces, poor drainage, and premature wear.
A: Typically, you should allow 24 to 48 hours before foot traffic is permitted on the new driveway. For vehicle traffic, it's recommended to wait up to a week to ensure the resin has fully set and hardened, though this can vary based on temperature and humidity.
A: Common resin binders include epoxy (known for durability) and polyurethane (known for flexibility). Aggregates come in various sizes and colors, allowing for customization in both appearance and texture.
A: While DIY is possible, hiring experienced professionals is highly recommended. Their expertise ensures proper mixing, application, and finishing, which are critical for the longevity and aesthetic appeal of your driveway.
Reflecting on the resin driveway installation process provides valuable insights into what homeowners can expect. Throughout this guide, we explored the installation timeline, key stages, and various factors that can influence the overall experience. From site preparation to the application of resin and aggregate, each step plays a crucial role in achieving a beautiful and durable driveway.
It's important to remember that understanding these stages can help you feel more confident as you navigate your project. Whether you're considering DIY methods or hiring professionals, being informed will empower you to make the best choices for your home.
By keeping these points in mind, you can approach your resin driveway project with clarity and readiness. If you ever have questions or need further guidance, don't hesitate to reach out to me at Resin Driveways Nottingham. I'm here to help you enhance your home's curb appeal with the perfect resin solution!
Ready to take the plunge into your resin driveway project? The next step is to connect with professionals who can provide expert assessments and tailored quotes. At Resin Driveways Nottingham, we pride ourselves on offering personalized advice that aligns with your specific needs and vision.
Don't wait! Reach out for a consultation today and let’s discuss how we can transform your outdoor space. Together, we can create a stunning driveway that not only enhances the look of your property but also serves you well for years to come.
I'm excited to hear from you and help you embark on this journey to elevate your property with a beautiful resin driveway!
Here is a quick recap of the important points discussed in the article:
William Ashford is a Nottingham-based home improvement enthusiast and expert, passionate about enhancing property aesthetics and value through resin driveways. He shares practical advice to empower homeowners in making informed decisions about their outdoor spaces, blending lifestyle and functionality.

